
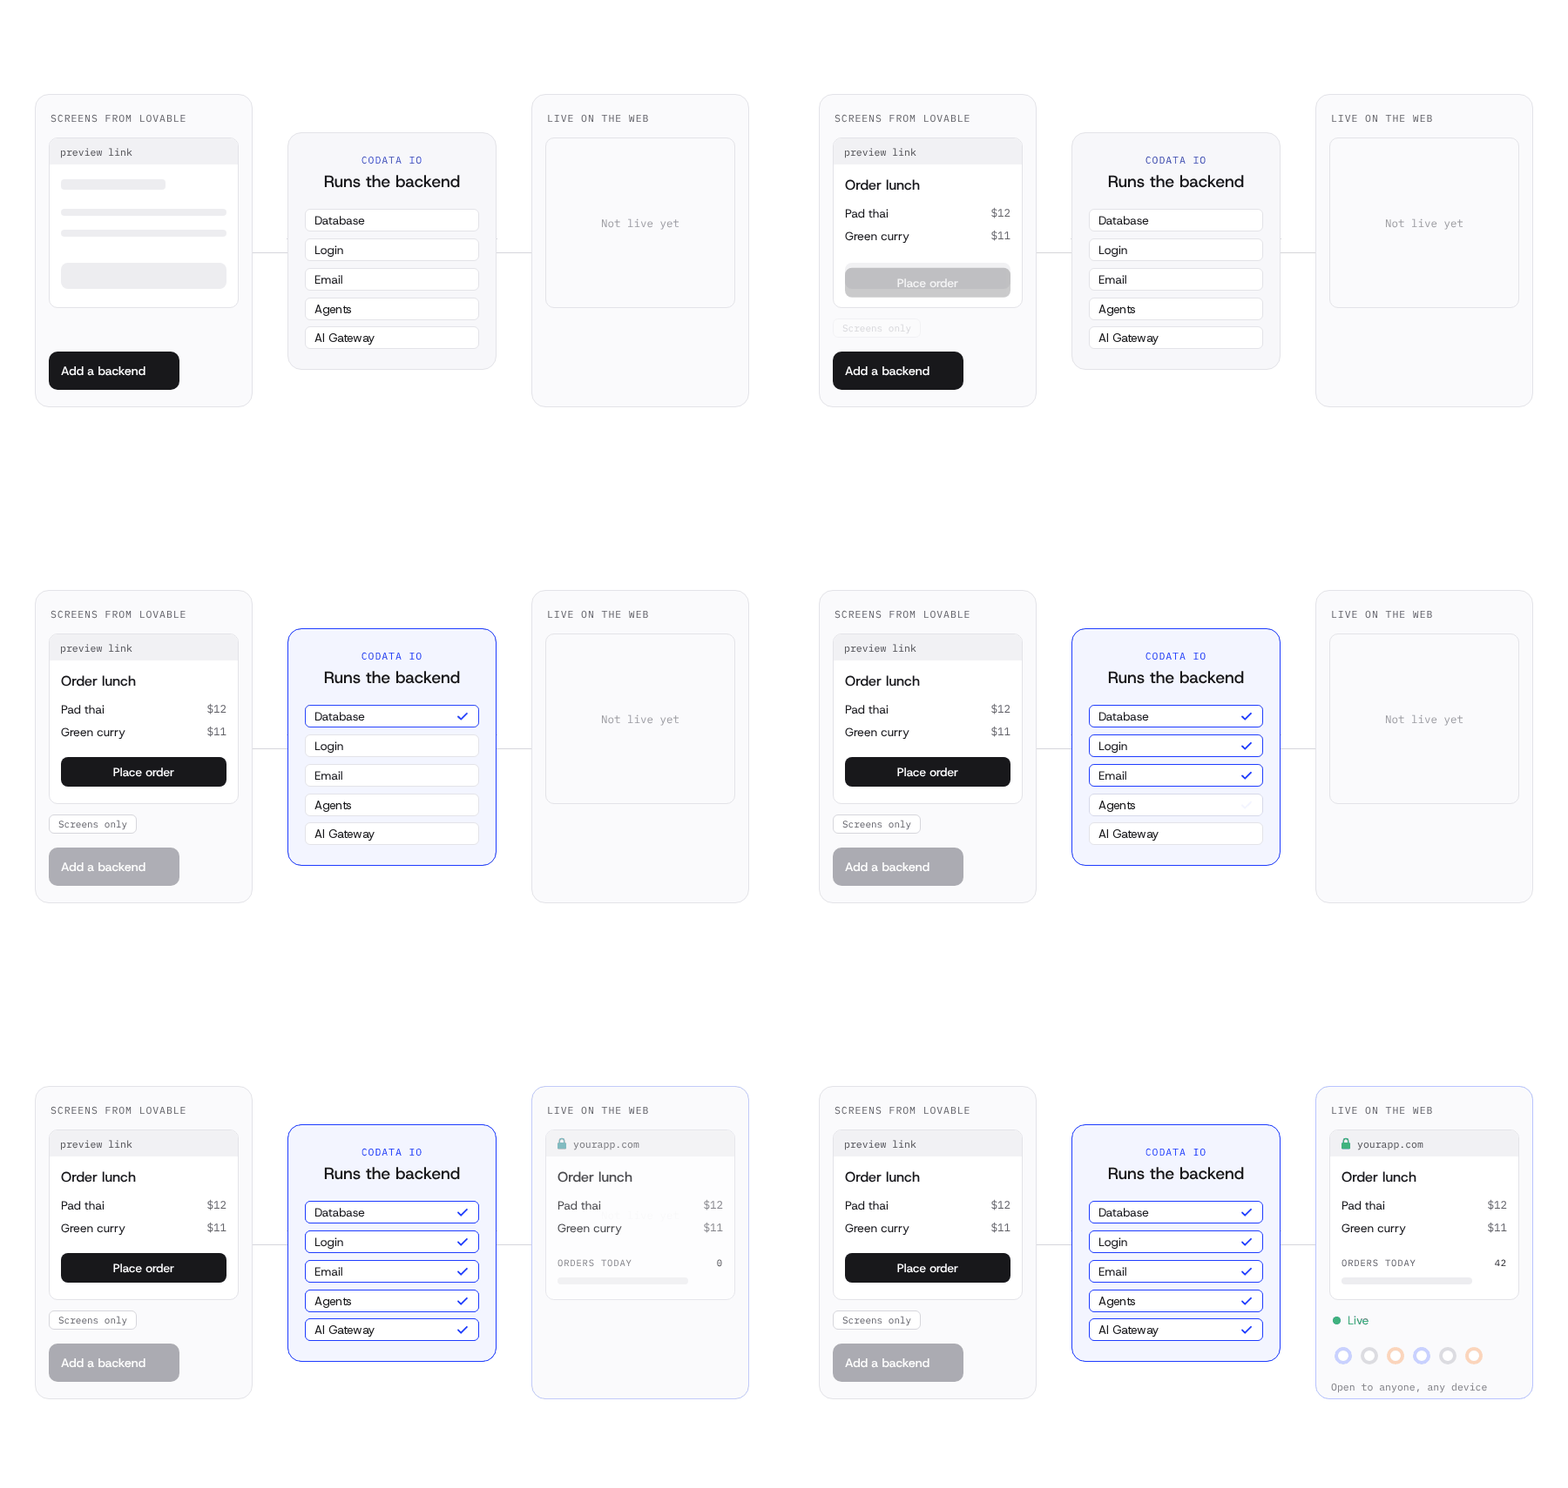
A Lovable backend comes in three forms. Lovable Cloud is built in, with a database, login, storage and functions. You can connect your own Supabase project instead. Or connect Lovable to Codata IO, the agentic cloud, through a custom connector, so the database, login, email are run for you.
The screens look done. Lovable got you from an idea to a working app fast, and that is no small thing. Now sign-ups need to save, and users need to log in.
That is the job of a Lovable backend: the part that stores data, checks who is signing in and keeps the app running. This guide is written for vibe coders building with AI, so no backend experience is needed.
It covers your three options, how to add login and how to take the app further. Most vibe coding backend questions come down to these same choices.
What a backend adds to a Lovable app
A backend adds memory, identity, logic and a live address to a Lovable app. It saves data, checks who is logged in and keeps the app reachable.
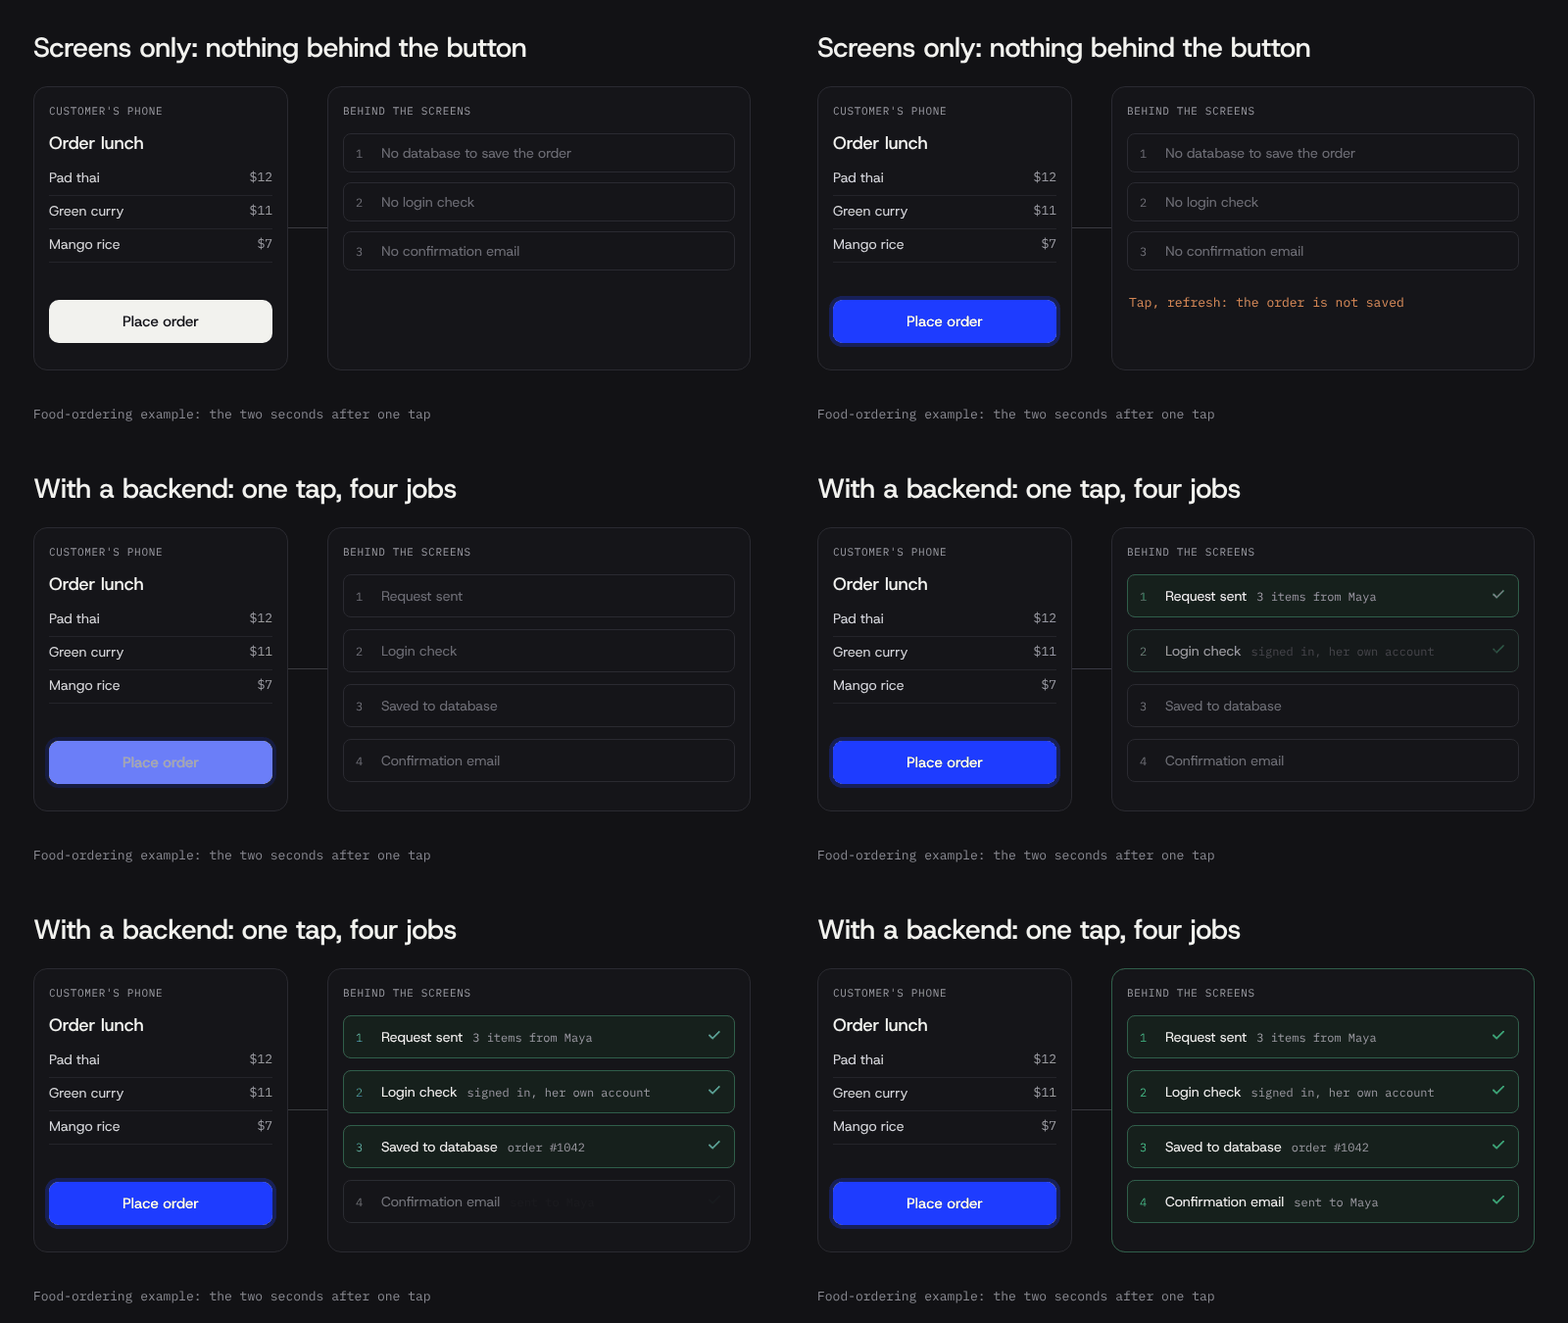
Picture a food-ordering app. Here is what happens in the two seconds after someone taps "Place order":
- The phone sends a request: this person wants these three items.
- The login check confirms who is ordering, so nobody can order on their account.
- A payment provider charges the card, and the app keeps a receipt.
- The database saves the order, so it survives a dead phone battery.
- The restaurant's screen updates in real time.
- A confirmation email goes out.
Lovable builds the screens for all of this. The backend does the work behind them.
The layers in plain words
| Layer | What it does | Food-ordering example |
|---|---|---|
| Database | The app's memory: users, orders, settings | Your past orders |
| Login | Checks who you are and what you can see | Signing in before you order |
| File storage | Keeps photos and documents | The menu photos |
| Server logic | Rules that run when you act | Adding the delivery fee |
| Payments | Charges cards through a payment provider | Paying in one tap |
| Email and notifications | Tells people something happened | "Your order is on its way" |
| Hosting and domain | Puts the app at an address people visit | yourapp.com in a browser |
| Keeping it alive | Backups, updates, staying up under load | Working on a busy Friday night |
Which layers each option covers
| Layer | Lovable Cloud | Your own Supabase project | Codata IO |
|---|---|---|---|
| Database | Yes | Yes (Postgres) | Yes |
| Login | Yes | Yes (Supabase Auth) | Yes |
| File storage | Yes | Yes | Yes |
| Server logic | Yes (functions) | Yes (edge functions) | Yes |
| Payments | Not listed | Not listed | Use a payment provider |
| Yes, branded emails | Login emails only | Yes, own email server | |
| Hosting and domain | Yes; custom domain on paid plans | Lovable hosts the app | Yes, with custom domains |
| Keeping it alive | Lovable runs it, billed in credits | Supabase runs it, on your Supabase plan | Yes, Codata runs it |
Sources, checked 21 Oct 2026: Lovable Cloud docs, Lovable Supabase guide, Lovable custom domains, Supabase auth email docs.
Whichever option you pick, plan to take payments through a payment provider.
Your three Lovable backend options
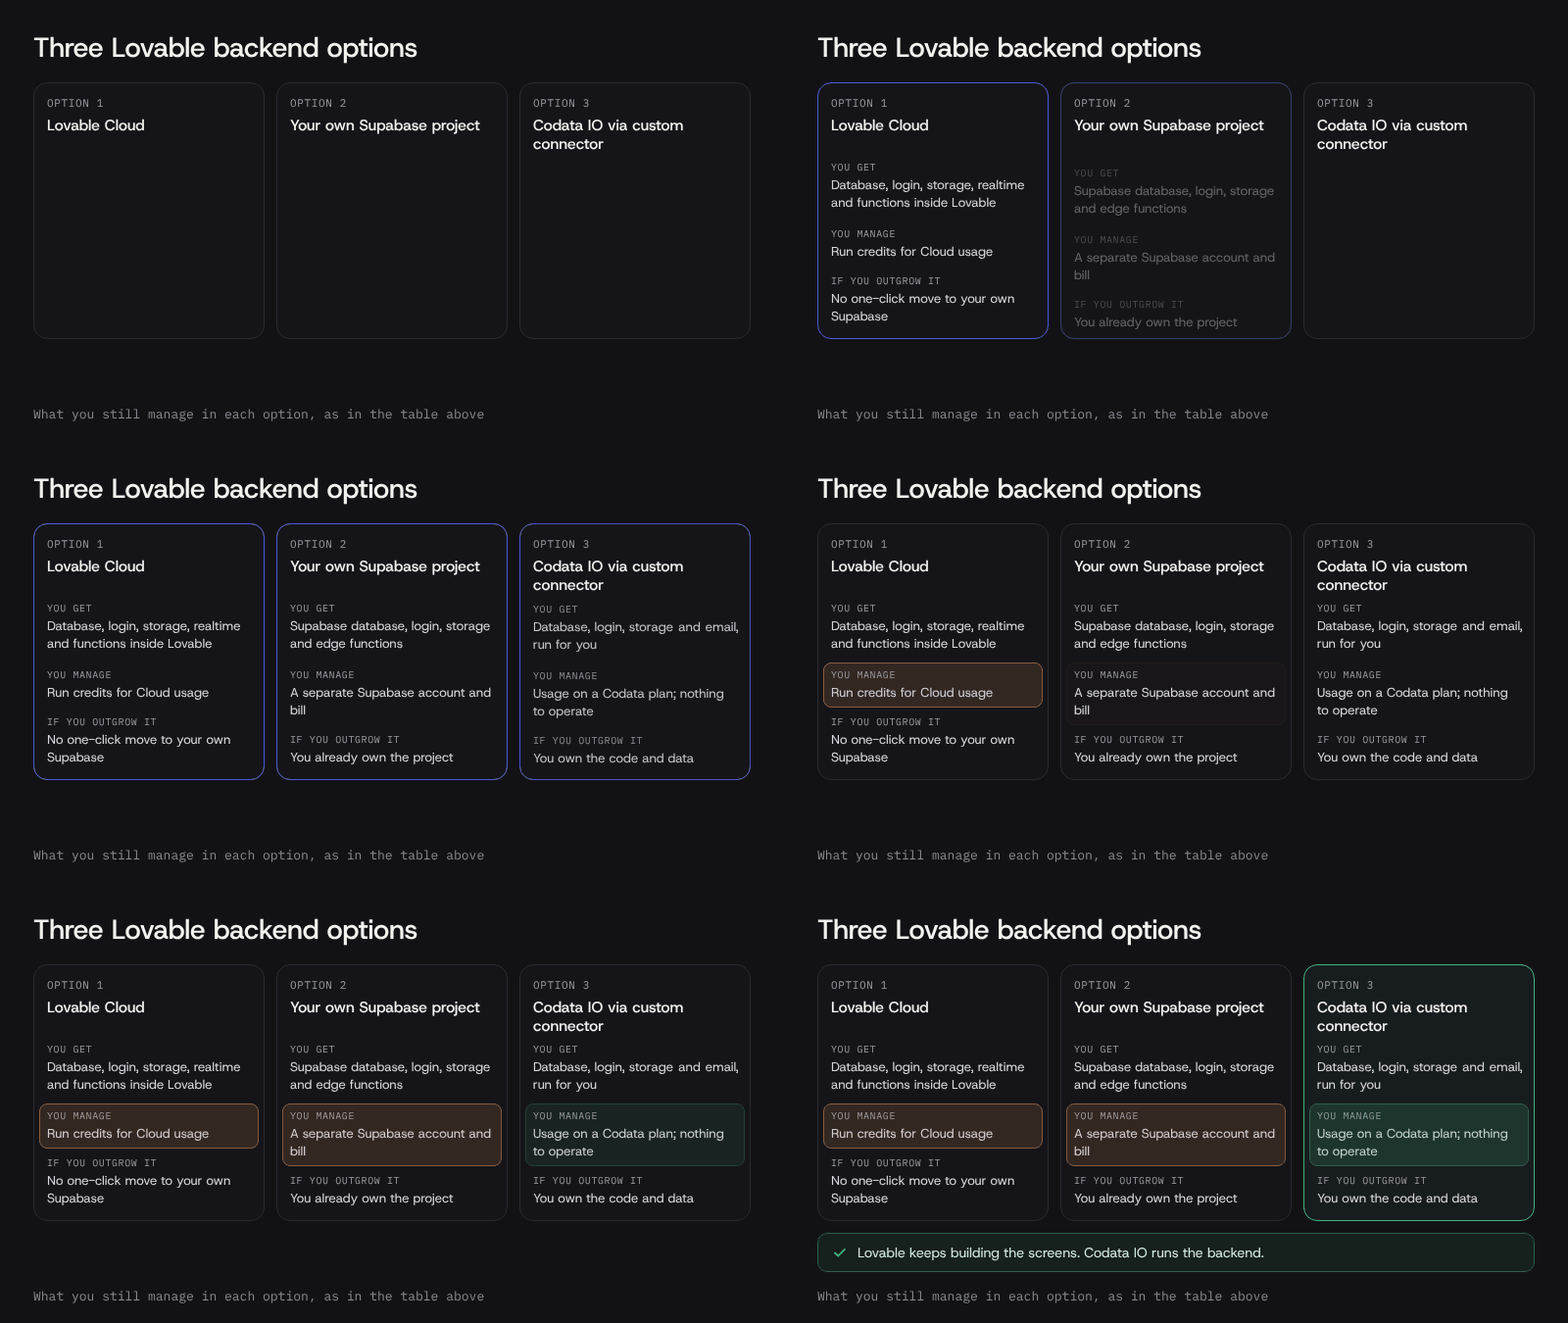
You have three Lovable backend options: keep Lovable Cloud, connect your own Supabase project, or connect Lovable to Codata IO through a custom connector.
| Option | What you get | What you manage | If you outgrow it |
|---|---|---|---|
| Lovable Cloud | Database, login, storage, realtime and functions inside Lovable | Run credits for Cloud usage | No one-click move to your own Supabase |
| Your own Supabase project | Supabase database, login, storage and edge functions | A separate Supabase account and bill | You already own the project |
| Codata IO via custom connector | Database, login, storage and email run for you | Usage on a Codata plan; nothing to operate | You own the code and data |
Sources, checked 21 Oct 2026: Lovable Cloud docs, Lovable Supabase guide, Codata IO pricing.
Lovable Cloud
Lovable Cloud is Lovable's built-in backend. It includes a database, storage, authentication, realtime and functions, plus secrets, scheduled jobs and logs. Lovable's docs say it "utilizes Supabase's open-source foundation."
Cloud usage counts toward Lovable's Run credits, and the Free, Pro and Business plans include monthly Cloud grants (source). It is the quickest path if you plan to stay inside Lovable.
Your own Supabase project
With the Supabase integration, Lovable uses a Supabase project you own as the app's backend. You manage data, users and files in the Supabase dashboard, and Supabase bills you directly.
You pick Cloud or Supabase when you start a new project (source). Weighing Supabase itself? Our guide to Supabase alternatives for AI builders compares seven options.
Codata IO through a custom connector
Codata IO is the agentic cloud for AI builders and agents. Lovable connects to it through a custom connector, and Codata runs the database, login, storage and email for the app.
Bringing Lovable as your agent uses no App Builder credits. The Codata IO Free plan includes 2 live apps and $5 of usage one time, with no card. The app pauses when that usage is used up.
More than 1,300 apps are built and live on Codata, and your first app can be live in under an hour.
Connect Lovable to Codata IO, step by step
Connecting Lovable to Codata IO takes four steps. You add Codata as a custom MCP server in Lovable's Connectors, so Lovable's agent can design and change your backend while it builds.
Start a project in Codata IO. Sign in at app.codata.io and choose New project.
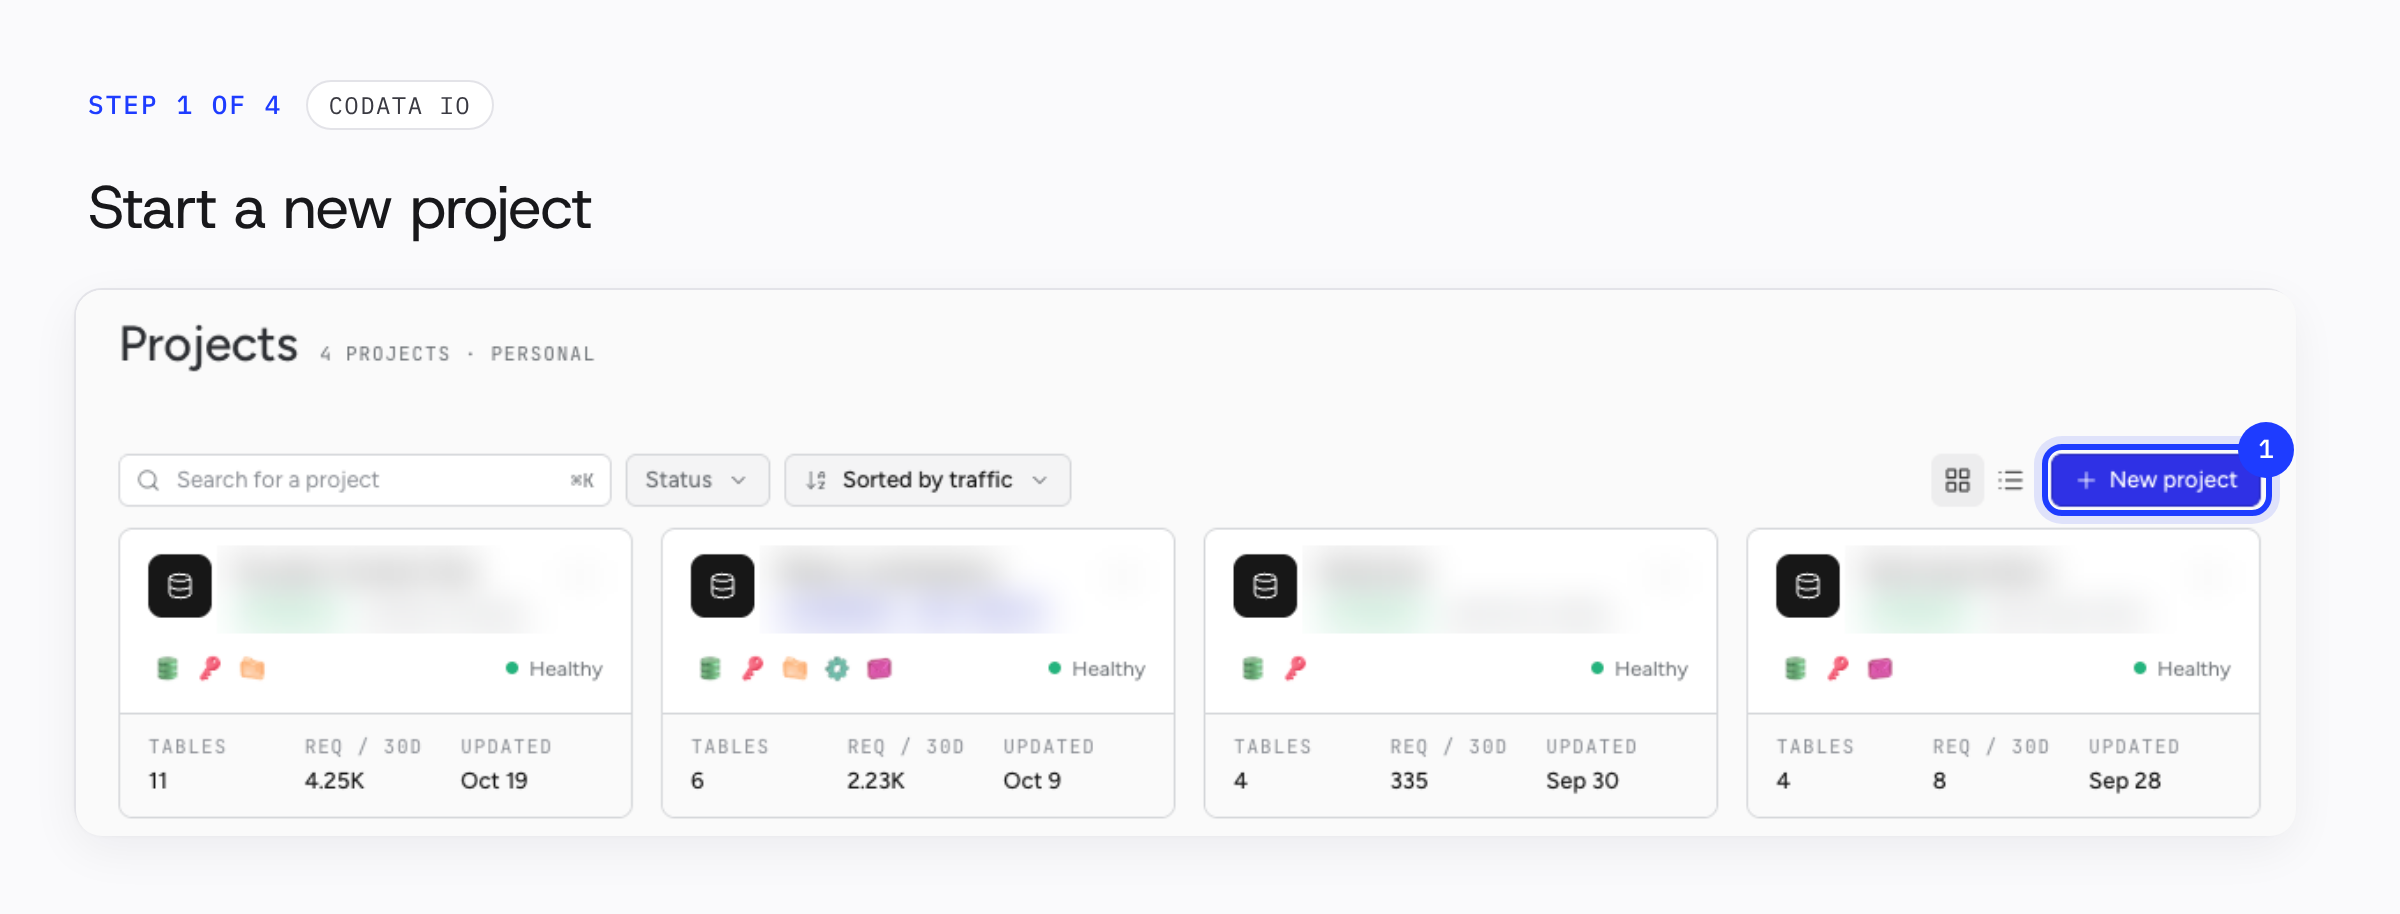
Step 1: start a new project in Codata IO. Pick Lovable as your agent. Choose “My coding agent builds it”, then Lovable. Codata IO shows the Lovable setup next.
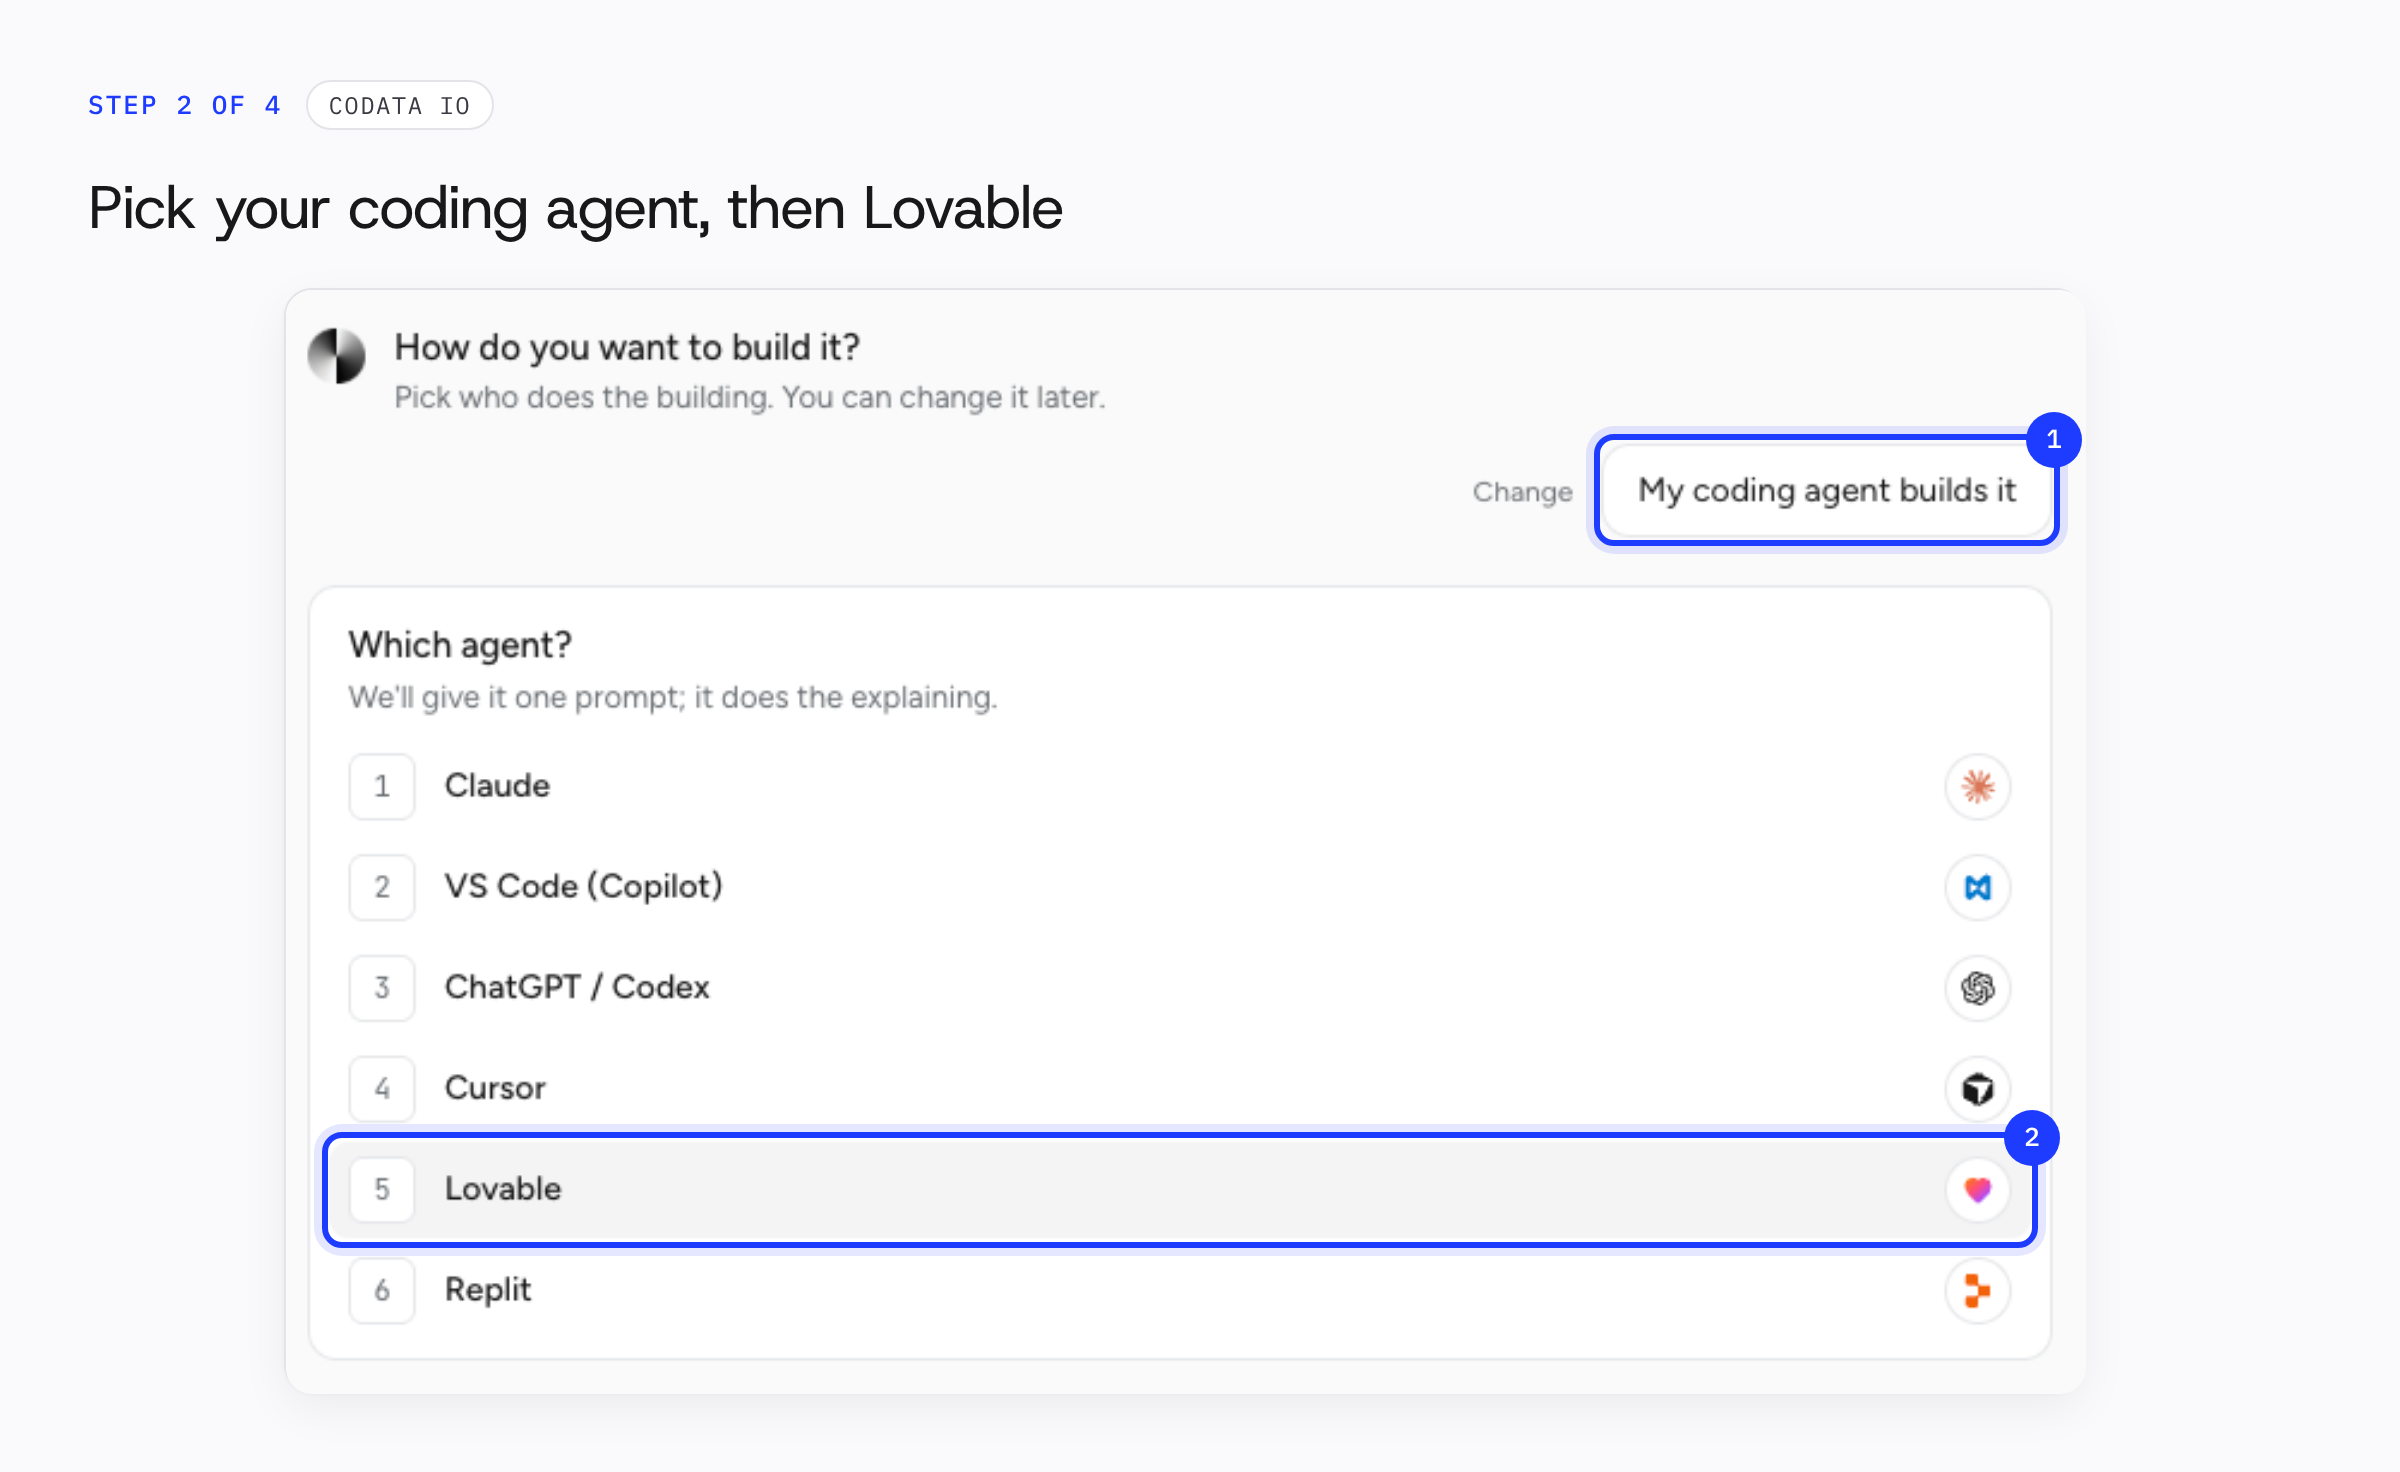
Step 2: choose your coding agent, then Lovable. Copy the server details. Copy the server name, Codata, and the server URL, https://mcp.codata.io/mcp.
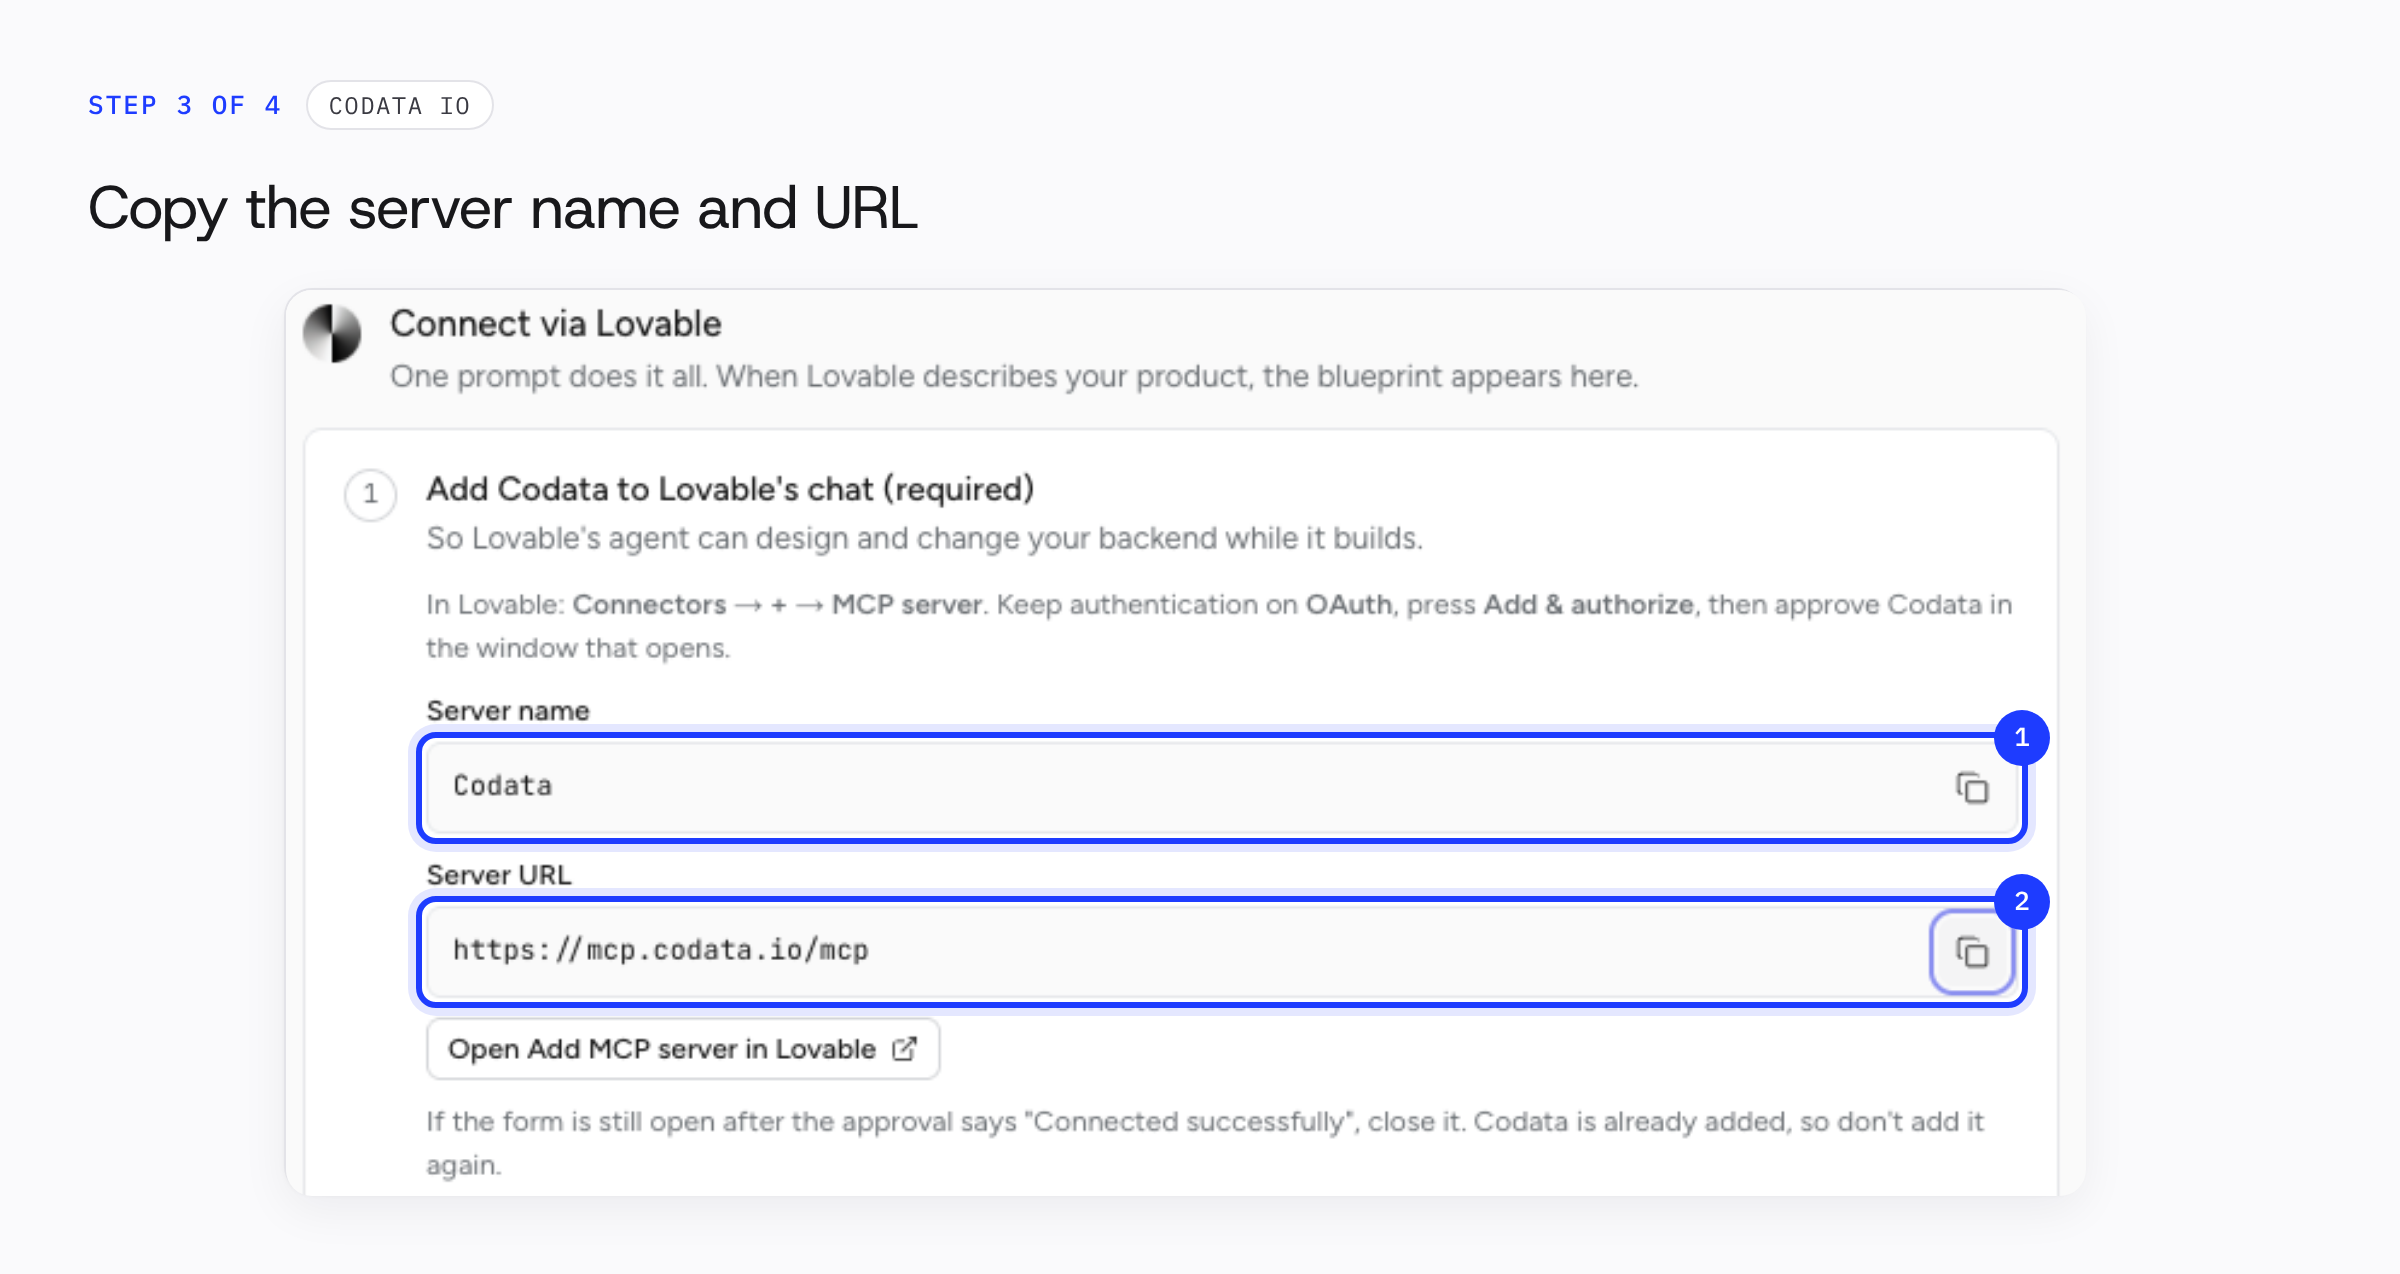
Step 3: copy the server name and URL. Add Codata in Lovable. Open Connectors, choose Add custom, then MCP server. Paste the name and URL, keep OAuth, press Add & authorize and approve Codata in the window that opens.
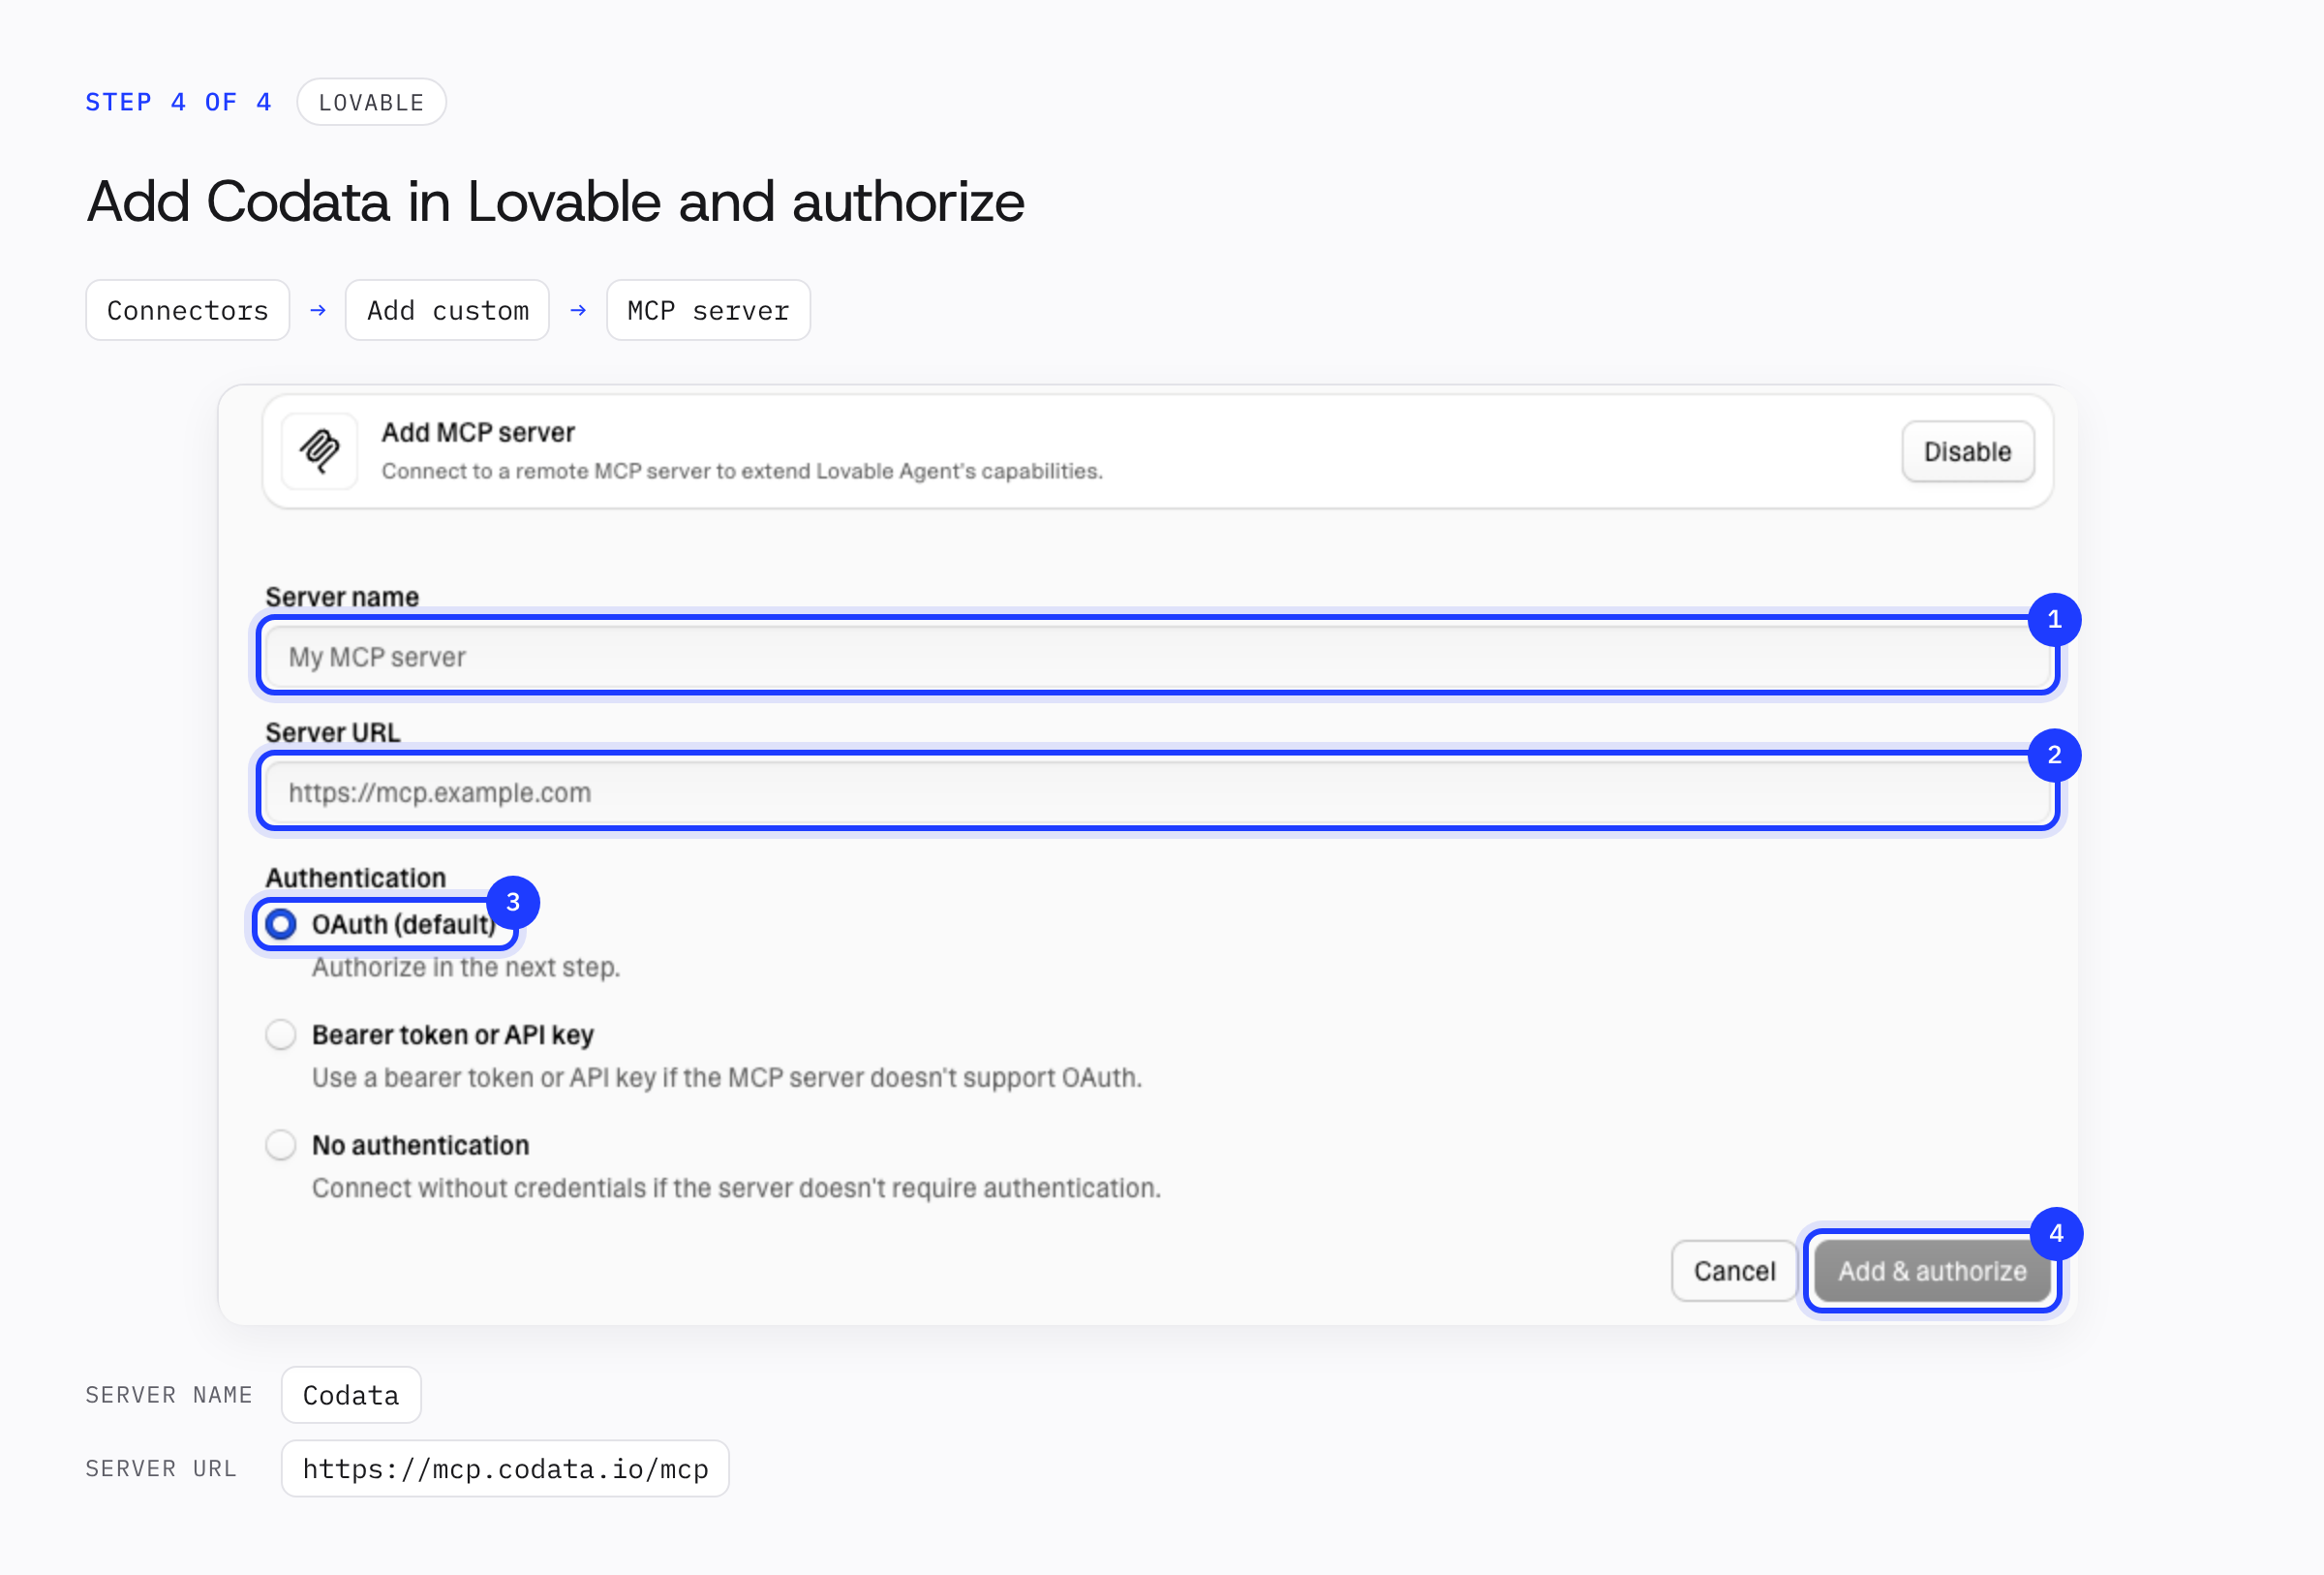
Step 4: add Codata as an MCP server in Lovable and authorize it.
That’s it. Describe your app to Lovable, and the backend plan appears in Codata IO as Lovable builds.
Codata IO’s setup also offers an optional second connector, so your app calls Codata with its key kept on Lovable’s servers.
Using a different coding agent?
Codata IO works with other coding agents too. Pick yours to see its setup steps:
- Claude Code setup
- Cursor setup
- Codex setup
- VS Code (Copilot Chat) setup
- Windsurf setup
- Claude Desktop setup
- Any editor: run
npx @codata-io/cli init, which detects your editor and writes the config (one-line setup).
Adding login to your Lovable app
Login lets people create an account and come back to their own data. Each option handles it a little differently.
- Lovable Cloud: Cloud login supports email, phone, Google, Apple, Microsoft, Lovable, SAML SSO and OIDC. Unless you name methods, Lovable sets up email and password, Google and Lovable sign-in. Change them in chat or in the Cloud Users area.
- Your own Supabase project: login runs on Supabase Auth. You set up social sign-in in the Supabase dashboard, then ask Lovable to add the buttons (source).
- Codata IO: authentication is included, alongside the database.
Test with a stranger's account
Good auth for AI apps is tested the way a stranger would use it. Your own account hides problems, because you already have data and settings.
- Open a private browser window and sign up with a second email address.
- Check that the new account sees only its own data, never yours.
- Sign out, sign back in and reset the password.
- Repeat on the published address, not only the preview.
That last step matters. Lovable notes that sign-in can work in preview but fail on a published app, usually because of a missing redirect URL.
Taking your Lovable app further
Taking a Lovable app further means getting the code out, working in your own editor or changing where the backend runs.
GitHub sync is two-way. Edits in Lovable push to GitHub, and commits on the active branch flow back. Lovable only syncs one branch at a time, and connecting always creates a new repository rather than linking an existing one.
You can clone the repo, work in your preferred editor and deploy outside Lovable (source). There, an agent such as Claude Code or Cursor can keep building.
Moving off Lovable Cloud takes planning. Lovable says there is no one-click migration from Cloud to your own Supabase project. You export your data, connect Supabase to a new Lovable project and rebuild the schema.
Moving from Supabase to Cloud is not supported at the moment. If you are asking how to deploy a Lovable app elsewhere, Lovable lists what to rebuild: login providers, secrets, edge functions and scheduled jobs.
Which Lovable backend option fits
Pick the option that matches who you want running the app next month.
- Stay inside Lovable: choose Lovable Cloud. Everything lives in one place and bills in Lovable credits.
- Own your backend account: choose your own Supabase project. You manage it in the Supabase dashboard and pay Supabase directly.
- Want the app run for you after the agent leaves: choose Codata IO. Lovable builds the screens and hosts the frontend, and Codata keeps the database, logins and emails running.
One question settles most cases: when the chat ends, who keeps the app alive? The agent's work ends with the conversation. Your app doesn't.
FAQ
Does Lovable have a backend?
Yes. Lovable Cloud is Lovable's built-in backend, with a database, storage, authentication, realtime and functions, plus secrets, scheduled jobs and logs. New projects can use Cloud or connect a Supabase project you own. You can also connect Lovable to Codata IO through a custom connector.
Is Lovable Cloud Supabase?
Lovable Cloud is built on Supabase technology, but it is Lovable's own product. Lovable says the built-in backend "utilizes Supabase's open-source foundation." You manage it inside Lovable and pay in Lovable credits, while the Supabase integration uses a separate Supabase account and bill.
Can I move from Lovable Cloud to my own Supabase?
Yes, but not in one click. Lovable says there is no one-click migration from Cloud to your own Supabase project. You export your data, connect Supabase to a new Lovable project and rebuild the schema. Moving from Supabase to Cloud is not supported at the moment.
How do I publish a Lovable app with a real backend?
Turn on Lovable Cloud or connect a backend, then publish. Lovable hosts published apps on a lovable.app address, and custom domains need a paid plan. To run the app on Codata IO instead, connect Lovable through a custom connector, and Codata hosts the database, authentication and transactional emails.
Can I use Lovable with a different backend?
Yes. Besides Lovable Cloud, you can connect a Supabase project you own, or connect Lovable to Codata IO through a custom connector. Codata runs the database, login and email as your vibe coding backend. Bringing Lovable as your agent uses no App Builder credits.